Tuesday 25 September 2012

The Austin 7 Ace Project


Over the last two years, when time and good weather have allowed, I have been refinishing a friend's 1932 Austin 7 Ace sports car. Just another reason the Zephyr is not yet ready for the road.

The finished paint job


Two years ago; first undercoats on. Many hours of sanding and repainting were required as it is 80 years old and had a good shunt up the rear before the mid fifties. I know this because the owner from this era is a member of the Austin 7 Club locally. Bits of oil can were found grafted in to the tail! Both sides were completely replaced as part of the panel work before it came to me.


This is what I started with; plenty of bog, ripples, hollows and scratch marks from the panel work. One of the guards got a few spots of rain on it, so had to be reprimed and painted. The joys of having to work outdoors!

The rear guard primed for the second time. A couple of ripples can still be seen near the trailing edges of this guard even at this stage.


Rear guard top coat fresh off the gun.


Celebrity endorsed paint job!
Sparkling Monza red after cutting back with 1200 grit and machine polishing with two grades of cutting compound. Swirl remover is next.


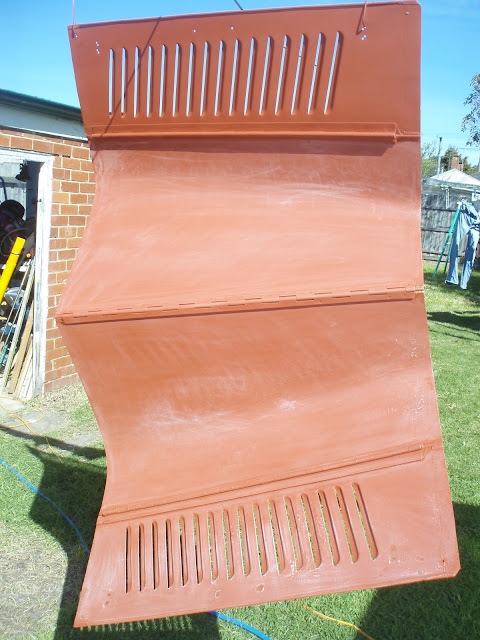
Painting the bonnet presented some challenges.


Primed and the inside painted red.


Spot putty was next followed by heavy coats of primer over the block sanded filler. This process is repeated a number of times to achieve the desired smooth finish. Time was against me on this one and I didn't have the luxury of doing this 10 or more times to get it perfect.


A few days ago the car was driven here under it's own power for the first time. A sparkling new registration plate takes pride of place at the front and rear, having passed the Roadworthy Certificate examination earlier in the week. The front guard, valances and bonnet are still to be cut and polished.

 This is what makes it all worth while. It is great to see this beautifully proportioned car looking better than it did 50 years ago.

The hood is back with the upholsterer to make some changes.


The hood cover the first edition. The akward looking upright bits are being "smoothed over", after owner, Dennis, arranged a hinge to stow the section over windscreen flat when not fitted.


A very difficult windscreen to get watertight.


A "top" choice for fabric colour to go with the Monza red.

 The Austin 7 Ace is a 4 cylinder 750cc four stroke engined motor car built in England and bodied here in Australia. Production of the 7 started in 1922 and continued until 1938. It was the British answer to the Model T, in many ways, being dubbed "the motor for the millions". This car has a four speed gearbox ith syncromesh on 3rd and 4th. Brakes are linked to all four wheels.

 This Ace handles very well for a car of it's age and has surprisingly nippy performance.

Monday 24 September 2012

Other projects

Another bike picked up from "hard waste" - Giant MTX 150. My eldest daughter used this for 2 years, until upgrading to a 24 inch wheeled bike. This is great bike, aluminium framed, light weight yet very well built. My youngest daughter was to have it next, but she didn't like the colour! I managed to find her a Raleigh aluminium framed bike that was brand new, used once and was the right colour. The cost was $30. It had a loose crank set - not an uncommon fault on bikes; a lot of people don't realise the left side is left hand thread, so end up loosening rather than tightening the nuts. After ten minutes adjusting the crank and brakes it was just like new. That left me with this bike surplus. The wheels were not the right ones; steel rimmed and they had rusted quite badly. I'd had another front for some time. Then I picked up the rear wheel... well, you know how by now! The front brakes needed replacing and surface rust removed from the handle bars and anciliaries. Once done it sold on Ebay for $146!

The two rear bikes came from hard waste at different times

 A better view of one of the bikes collected from the side of the road. This is "Lady Goose",  from the Mongoose range of bikes. This one has no parts I need, so I will sell or give it away. It's a surprisingly good condition bike.

My Cruiser bike. Bought used from Ebay for $120. I have done some pinstriping on this one, but I'll finish the job before publishing. It has flame tread tyres and 72 spoke wheels and is really fun to ride..

A project from 9 years ago, a 1950's Cyclops Comet pedal car.

  They are fairly common here in Australia. This one came without wheels but was otherwise complete, just bashed about. To be expected, I guess. I chose this one as it had no major rust. Firstly it was sent off to the sandblasters, then off to a friend for panelbeating. To get the flutes in the front straight, Reg had to cut the front off. This suited my intentions perfectly, as he then de-seemed the front and the line along the side that were originally just spot welded. The holes in the front where the fake radiator cap once bolted on were filled when I got it back and this also helped with my hot rod "shaved" look.
 Next was the paint job - not well shown off here, due to poor light. It is a "candy apple" scheme in "organic green". Candy apple is a technique as well as a brand name, and not a shade of red as many think. It is basically a translucent colour added to the clear coat sprayed over a silver base coat. The paint still hasn't been cut and polished, but will now need to be done as the gloss is beginning to fade.
One day I will find the set of racing go kart front wheels and tyres that I have always intended to put on.

A bookshelf that I made a few years ago.

.


Project "Tandem BMX bike"

 More than nine different bikes were used as parts donors to make this one of a kind BMX.


Built entirely from scrap bikes left on the side of the road for the annual "hard waste" collection, this tandem project has cost less than $10.

Initially put together about two years ago, this project was servicable but scruffy and unfinished. The last "hard waste" in August saw some very tidy bikes put out for scrap. Being out on the scavenge for bits for another project, it was too tempting to collect some bikes with useful parts to upgrade the tandem.

Some decals left over from a paint job 16 years ago finished the look off quite nicely.

 This picture shows the almost new wheel (one of a pair) that I got last month. The rear brake has now been installed and tabs welded on for the gear change cable. The cable was run in and connected after this photo was snapped, as the light was starting to fade.

 Front forks were replaced, again from the spoils of the last "hard waste" as they had better brakes fitted.

My girls chose the colour from a limited palate made up of "mistinted" paints bought cheaply. It is brush painted in enamel house paint.

A few hours with a paint brush and the job looks a lot tidier. I got a little carried away with the pinstriping!

This photo, although out of focus, shows where the seat post from another bike was inverted and stitched in between the two 20" frames to give the rear rider (stoker) enough room. The join was then bogged over and smoothed. The goose neck for the rear handle bars has been turned around to give the "captain" enough room on the seat.


Finishing touches like the reflecters, handle grips, crash pads, seats and coloured pedals all came in the last batch of bikes pilfoured for parts.

One of the toughest things to sort out was the chain set up. Two sprockets were welded together on the rear crank. Enough space had to be left for the counter rotating chains at the back of the sprockets. The final drive sprocket is welded on the outside and is a smaller diameter to reduce the chances of anything catching between the two. Originally both bikes were "coaster wheel" brake (back pedal for brakes); not a good idea for a tandem. I couldn't find a freewheeling hubbed wheel, so I stretched the rear forks out a little and fitted a six speed wheel. This has some advantages for riding, but meant more work to set up.
 Tensioning the front chain was also a challenge. Ideally I only wanted a single idler sprocket. Most tandems use an adjustable rigid mount idler sprocket. It was far easier to set up a deraileur to achieve the tension and I like the idea of the spring action. It seems safer for kids some how.